Introduction
This How To will show you how to correctly login, view and amend your employee details. You will also learn how to record your absences on the system.
Setting Up Your Account

You will receive the above email asking you to sign into your account.
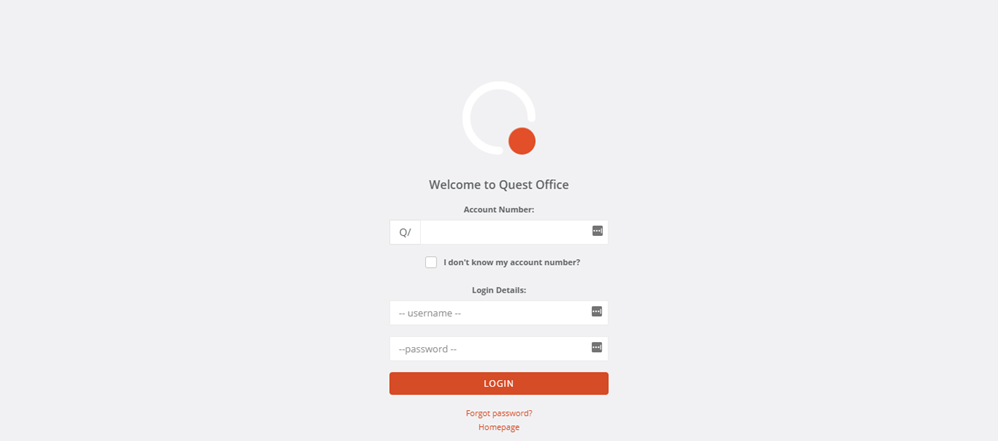
Click on the SIGN IN TO YOUR ACCOUNT link and it will take you to the login screen below.
Once you have logged in using the details supplied in the activation email, you will be taken to the next screen to the CHANGE PASSWORD screen shown below.
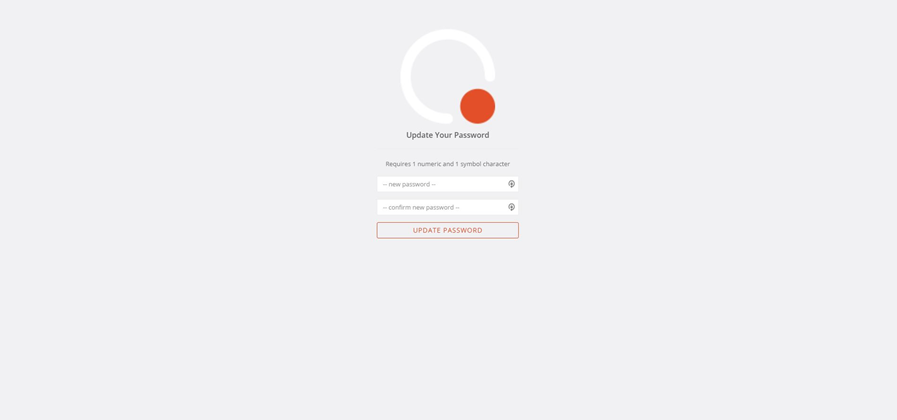
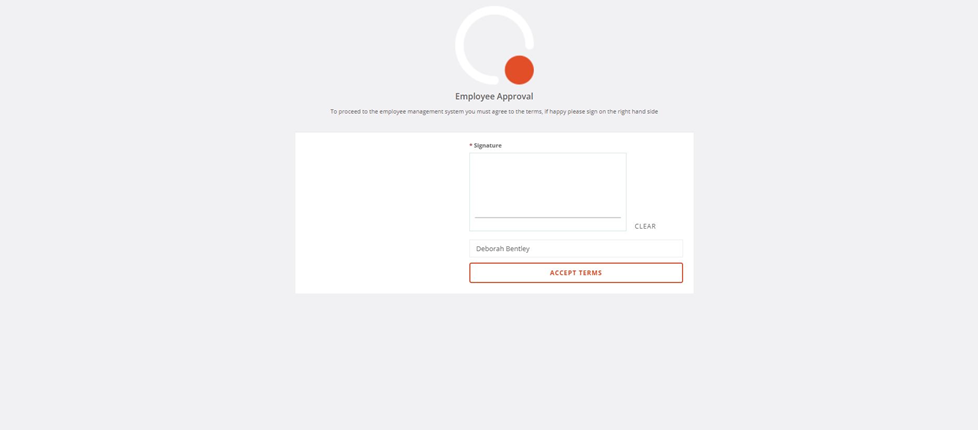
Create a new, memorable password for your Quest account. You will then be taken to the EMPLOYEE APPROVAL screen, where you will be asked to sign and print your name to accept the terms of the system.
And you’re in!
Booking Holidays

From here you can view and update your personal details and contacts as well as view documents relating to your employment, by clicking on the relevant tab.
To request time off, click PLANNER tab. Your planner will appear.
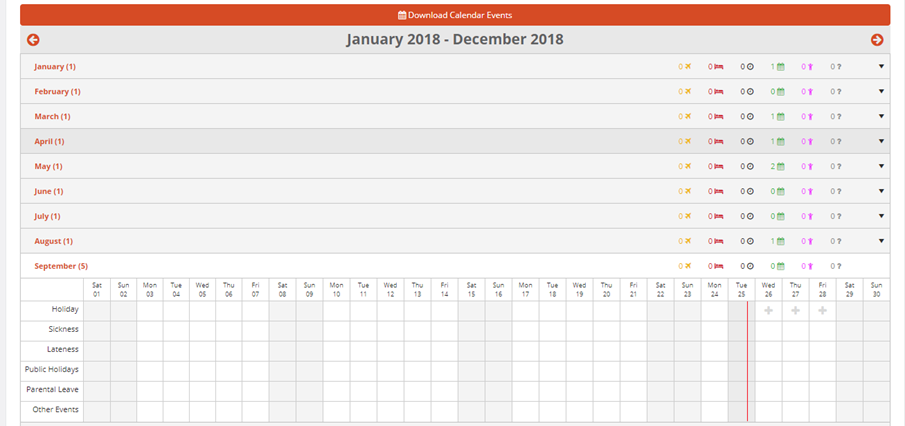
Select the month in which you would like to book your time off. Then select the day by clicking the ‘+’ symbol. This will then pop up with a request box.
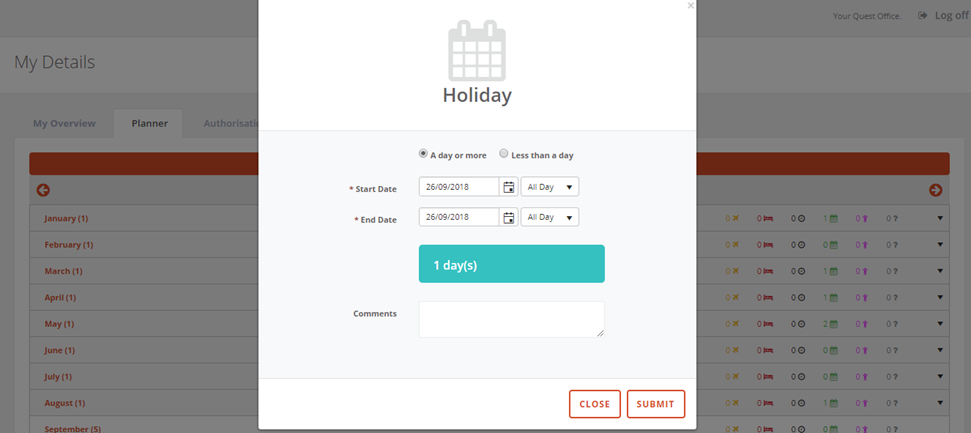
Select whether the time off will be for a day or more or whether it will be less than a day.
Ensure the start and end dates of your required time off are correct. Add a comment to state what the holiday is for and click submit.
The system will send through an approval request to your Line Manager. Your Line Manager will receive an email asking them to approve or decline the request.
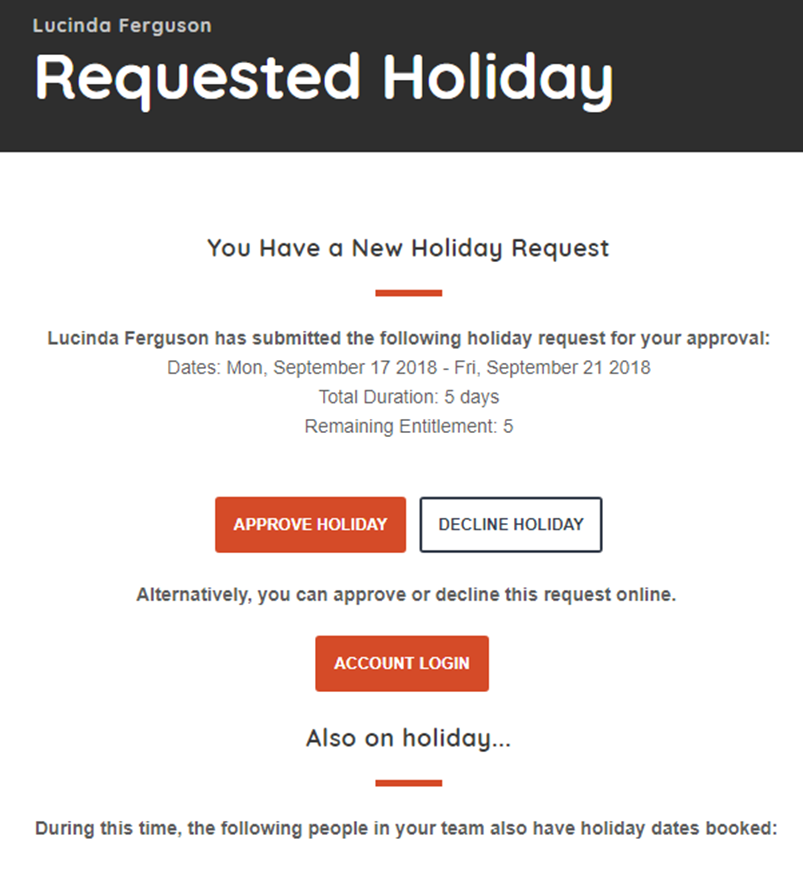
Once your manager approves your holiday, you will receive the below message.
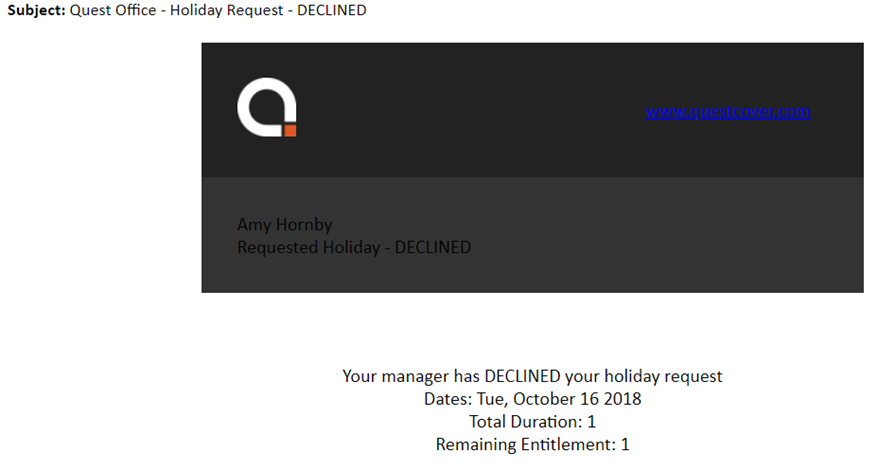
If your manager has had to decline your request, you will receive the message below. Your manager will advise you of why they have declined your request.
My Details
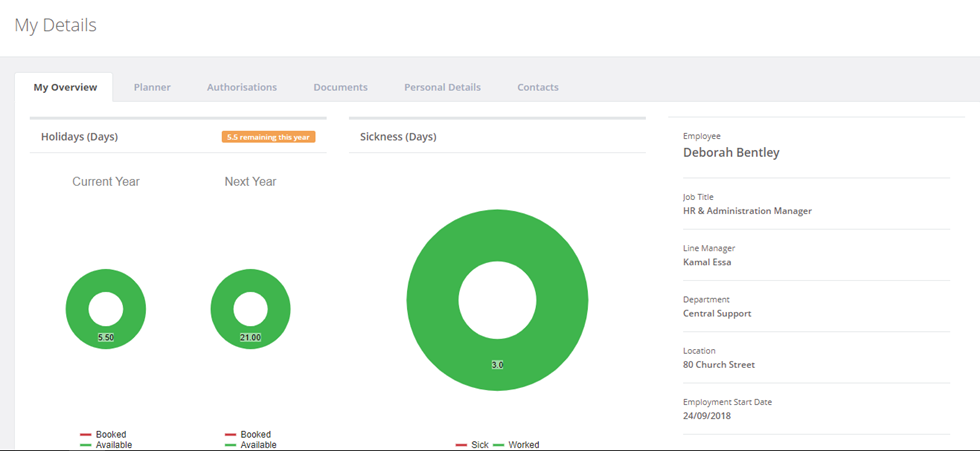
My Overview is your dashboard where you can see and at a glance breakdown of your absences, including how many days annual leave you have remaining to take.
Planner is a detailed view of your absences, including any holidays, sickness and unpaid leave.
Authorisations ‘does what it says on the tin’ and is a record of your holiday request authorisations.
Documents is where all your personal HR documents are stored. This includes items like your Contract of Employment and any correspondence. Occasionally, you may be prompted to sign for a document, anything that requires a signature, will show as pending. To sign the document, click PENDING, a pop up will appear, similar to when you first logged into the system.
Personal Details / Contacts this is where the information we hold for you is stored. It is important that your personal details are kept up to date. In the Quest system, you can change and update these details as and when required. Simply click on the Personal Details or Contacts tab to updated / amend your information on the system. Then click SAVE CHANGES.